First of all, what the #*!& is an Aux Send?
An Aux Send is a part of a mixing board that lets you take the signal from one track and direct it somewhere else.
Why would you want to do that?
One big reason is to have a multiple tracks going to the same FX processor.
Why would you want to do that?
- versatility - isn't it more useful to have an effect be accessible to every track rather than just one track? Also, you can get really creative by sending sounds to different places and doing different things in the mix.
- simplicity - instead of putting an reverb on every track, you can just have one reverb and send whatever you want to it
- less processing power - why make your computer do a bunch of extra work if you don't have to
- gives your mix a more consistent sound.

When you click on one of the double arrows, you will be asked to choose either interface or bus. What is the difference?
Interface refers to something outside of the computer - you are talking about running something into or out of Pro Tools.
Bus refers to directing a signal to somewhere else inside Pro Tools, like another track.
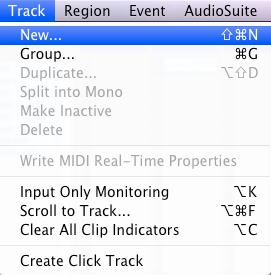
Actually, you can create a special type of track in Pro Tools that is meant for being used with the Aux Sends. It is called an Aux Input and you can create it the same way you would create an audio track: Track>New Track
 From there you just change the type of track from audio to Aux Input.
So now, you are going to try creating some Aux Inputs to use for FX on your own music.
Please do the following assignment:
- Open the Pro Tools session of your most complete song. (If you don't have a song in Pro Tools, ask one of your classmates if you can use one of theirs for this assignment.)
- Go to the Track menu>New Track and create 2 Stereo Aux Inputs.
- Change the name of Aux 1 to "Drum FX".
- Change the name of Aux 2 to "Vocal FX".
- On the Drum FX track, change the input to Bus 1-2.
- On the Vocal FX track, change the input to Bus 3-4.
- In the Insert section of the Drum FX track, create a DVerb reverb processor (multichannel plugin>Reverb>D-Verb (stereo))
- On ALL of your drum tracks (bass, snare, clap, hi hats, shakers, toms, tambourines, etc.), go to the Sends section and create a send going to Bus 1-2.

- Solo each of these drum tracks and the Drum FX track so that you can only hear the drums.
- Now one-by-one, click on each of the drum sends and raise the faders
 to where you can hear the track going through the reverb. Set it to where it sounds good - HINT: LESS IS USUALLY MORE! Some tracks might sound best with NO reverb on it.
 - Try adjusting the settings of the D-Verb to get slightly different sounds (Church, Room, Plate, etc.)
- When you've got the drums sounding good, unsolo everything and listen to the whole beat. Does it sound good? If not, why? Is there something you could change to make it better?
- Now see if you can do the same process with all of your vocal tracks (use Bus 3-4 in the Sends section)
- Save this and have one of the instructors check it out.

No comments:
Post a Comment