Wednesday, March 25, 2009

Audio Post: Film Scoring - part 2


Alright, I'm back folks! I hope you had a productive day last week when I was gone and that you were able to catch up on missing work. Now that we're all together again, we're going to get back into working on film scores.

Today, I want you to pick two more short clips that you're going to work with (in separate Pro Tools sessions). You can find the clips in Media Share>Class Materials>Movie Trailers>Film Score.

Please do the following:
  1. Check out all three clips and pick two that you want to work with. Copy them to your hard drive.
  2. Go into the same folder and get the file called Film Scoring_writeup. odt (Media Share>Class Materials>Movie Trailers>Film Score>Film Scoring_writeup.odt). Copy it to your hard drive and open it.
  3. Fill out the worksheet for the first film.
  4. Save the document as your name_fs writeup.
  5. Start a new Pro Tools session and Import the first movie clip into it.
  6. Create an original score using Rewire and/or other soft synths. (minimum 3 instruments)
  7. When you are done, save the PT session as your name_film score 1.
  8. Bounce the clip with your original score as a Quicktime movie called your name_film score 1.
  9. Put a copy in the Student Work folder on the Media Share.
  10. Repeat the above steps for your second film clip. Be sure to label both the PT Session and the Quicktime movie for this one as your name_film score 2.
  11. Turn in the fs writeup document to the Student Work folder.

Wednesday, March 18, 2009

Make It Up

Alright folks, so I'm out of town, but that doesn't mean you don't have anything to do while I'm gone! Like I said on Wednesday, I would like for you to use today to make up missing assignments, especially the audio post stuff we've been doing for the last few weeks.

Here are the assignments I am missing from each person:

  • Luis - Animation FX, Trailer ADR
  • Taurean - Audio Post FX1, Trailer ADR, Scary Score
  • Juan - Audio Post FX1, Trailer ADR, Scary Score
  • Robert - Animation FX, Trailer ADR, Scary Score
  • Gio - Audio Post Exercise, Audio Post FX1, Animation FX, Trailer ADR,
  • Alexi - Audio Post Exercise, Audio Post FX1, Animation FX (no dialog!), Scary Score (no sound)
  • Monjaro - Animation FX (movie is cut short), Trailer ADR
  • Tony - none
  • Rowvin - Audio Post FX1, Animation FX, Trailer ADR, Scary Score
  • Victor - Audio Post FX1, Trailer ADR
  • Chris - Audio Post FX1, Scary Score
  • Marisol - Trailer ADR,
  • Monica - Audio Post Exercise, Trailer ADR, Scary Score

Monday, March 16, 2009

Audio Post: Film scoring - part 1 (Rewire)


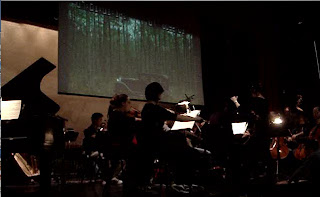
OK, so by now we have done some work with FX and dialog. Today, I want to spend some time working on the main musical aspect of film: the score.

According to Wikipedia:
"A film score is a broad term referring to the music in a film...The term soundtrack is often confused with film score, though a soundtrack may also include songs featured in the film as well as previously released music by other artists, while the score does not. A score is written specifically to accompany a film, by the original film's composer(s)."


So what are some of the differences between film scores and other kinds of music (like hip-hop songs?)
What kinds of instruments do you typically hear in a score? What kinds of things do you NOT hear?

The main purpose of the film score is to support the overall feel of the film and convey the emotions of the different scenes to the audience. It is very important for film scorers/composers to keep in mind that the main focus has to be the characters on the screen and the dialog. Usually, the music is NOT supposed to be the main element that the audience is focusing on, so the music should be done in a way that doesn't compete for the audience's attention - meaning you don't want the audience nodding to your beat when the characters on the screen are having a serious conversation!

So, you folks have actually already done some film scoring of your own in the last assignment. Did you have any challenges as you were doing it? Did the music line up with the images from the video?

Today we're going to focus a little more on scoring, but this time, you're going to write your music directly to the video. In order to do this, we need to get Reason working together with Pro Tools. This is possible through a thing called Rewire. Rewire allows you to control Reason through Pro Tools.

To Rewire Reason into Pro Tools, do the following:
  1. Create a new Pro Tools Session.
  2. Go to Track>New.
  3. Change the settings to 1, Stereo, Aux and hit the Create button.
  4. Now go to the Mix Window.
  5. At the bottom of your new Instrument track, find the little triangle and click on it. Make sure there is a checkmark next to the word "Instrument" in the menu that pops up. You should see this section appear at the top of the track:
  6. In the Inserts section, click on one of the double arrows and go to multi-channel plugin>Instrument>Reason. Reason should start up.
  7. In Reason, create an instrument that you can play with the keyboard (Subtractor/Malstrom/NN19/NNXT/etc.)
  8. Now go back to your Mix Window in Pro Tools.
  9. In the section at the top of the track, find where it says "none" and click on it. This is where you tell Pro Tools which Reason instrument you want to control with your keyboard.
  10. From the menu that drops down, click on the name of the instrument you just created in Reason. You should now be able to play the instrument from Pro Tools and record it, just like you would in Reason.
  11. From here you can create as many instruments in Reason as you want and create Instrument tracks for each one in Pro Tools. Don't forget to label them!!!
So, your assignment today is to Rewire Reason into Pro Tools and use it to score a short video clip. Please do the following:

  1. Create a new Pro Tools session and name it your name_scary score.
  2. Find the file on the Media Share folder called hauntinginconnecticut-edit01. (Media Share>Class Materials>Movie Trailers>haunginconnecticut-edit01). Copy it to your hard drive and Import it into your Pro Tools session.
  3. Watch it and start to think of what sounds you might want to use.
  4. Create and Instrument track and use Rewire to load Reason into it using the instructions above.
  5. Create an original score for this piece that uses at least 3 instruments and has a buildup section and a loud hit to scare the viewer. Make it scary!!!
  6. When you finish, Bounce it as a Quicktime movie and turn it into the Student Work folder.

Monday, March 9, 2009

Audio Post: ADR

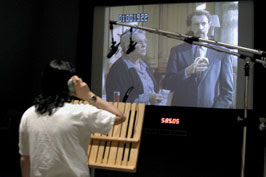
Did you know that most of the dialog that you hear in a movie was not recorded at the time when the scene was actually being shot? A lot of the actors' lines were rerecorded in a studio in order to get better sound quality, or sometimes a better performance. This process is called Automatic Dialog Replacement, or ADR. The trick is for the actor to be able to recreate the emotion from the scene and make it sound as natural as possible. Here is a clip showing the ADR process on the film "King Kong".


Real ADR is done through a process called looping, where a short scene is played over and over and the actor performs his/her lines repeatedly until he/she gets them just right. It is the mixing engineer's responsibility to make the recording sound as believable as possible in the scene. This is done by making decisions in the recording process (microphone placement) and in the mix afterwards (using reverb and other FX to make it sound like the character is in the actual setting on screen).

We are going to get into more professional looping later, but for today, I just want you to practice doing your own basic ADR. Please do the following:

  1. Go into the Media Share and check out all the different movie clips that I have picked out for you. (Media Share>Class Materials>Movie trailers). Pay special attention to the dialog and the music being used.
  2. Pick one you want to work with and copy it to your folder on your computer.
  3. Start a new Pro Tools session and call it your name_trailerADR.
  4. Import your movie clip.
Now do one of the following:
  • Get a microphone and begin recording all the lines in the film. You should not be personally doing all the ADR! Get your classmates to play different characters and record them. We will be trading the mics every 45 minutes, so try to work quickly!
  • In Reason, make 2 different beats that are each 30 sec.-1 min. in length. You are going to use these as the music bed for your clip, so make sure they match the emotion of the scene. Export your beats as audio files and import them into your Pro Tools session.
  • Find and place FX for the most important actions on screen (explosions, etc.)

Wednesday, March 4, 2009

Audio Post: Animation Project (part 2)


Today, I want you to focus on finishing up your Animation FX project. If you have finished gathering all your sounds and spotting them in your session, please spend some time working on the following:
  • Mixing - adjust the volume and PANNING of each track so that everything sounds the way it looks on the screen.
  • Automation - use automation to give movement to your sounds so that they match the actions on the screen. At the very least, please automate the sounds of the cars moving left to right.
  • Add some FX - you don't need to go crazy with this (unless you get all inspired). But I would like for you to at least set up a reverb plugin on an Aux track and send some of your tracks to it to give a more realistic feel to certain sounds (for example, everything happening in the theater).
So I'm not going to do a long lecture. But I did want to give you a few practical tips to help you with this project...

Tracks
How many audio tracks do you have available to you in Pro Tools LE? How about STEREO audio tracks?

This is actually sort of a trick question, because they just changed the number of tracks in Pro Tools LE 8. However, since we are only working with Pro Tools LE 7.4, we only have 32 total audio tracks. And since each stereo track is actually 2 audio tracks, you can only have up to 16 stereo tracks.

So, what do you do if you run out of tracks? Well, you have a couple of options:
  1. Put similar sounds onto 1 track. For example, all car sounds, all sword sounds, etc. could be grouped onto a single track, so that you don't have 1 little sound here or there taking up a whole track to itself. As long as you don't need for multiple sounds to be playing at once, you should be cool. Be careful when you are mixing, though, to pay attention to the different volume levels of the different regions on your track. You might have to adjust the gain of some regions to make them sit right in the mix.
  2. Split your Stereo Tracks into Mono and get rid of one of them. This is where it gets tricky, but I'll do my best to show you how to make this happen:
Splitting Stereo Tracks
Let's say I have the following stereo track in my session and I want to split it into mono so that I can cut the number of tracks from 2 to 1.
  1. Right-click on the track name and select Split Into Mono from the list.
  2. You should see two new tracks appear. They are the Left (L) side and Right (R) side of the original stereo track.
  3. Now right click again on the stereo track's name and select Hide and Make Inactive from the list. It should disappear.
  4. Now highlight one of the mono tracks by clicking on the track name. Select Delete from the list.
  5. Voila, you're down to one track and have one more free to use for other stuff!

Monday, March 2, 2009

Audio Post: Animation Project (part 1)

This week we're going to continue to work on our audio post skills by doing all the sound for a short animated clip. Cartoons are another special category of film/video from an audio perspective because there is no original sound to work with, or try to imitate. You can make up the whole sound of the world from scratch! There are no real rules and you are basically trying to make things sound even bigger and crazier than they do in real life.

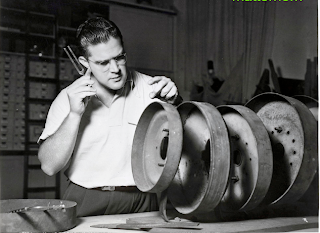
Here is a clip of the Disney film, "Steamboat Willie" the first animated short to have a completely post-produced soundtrack (music, dialog and fx)! Pay attention to the kinds of sounds that are being used and try to see if you can think of what sorts of objects were actually being used to make the sounds you're hearing:


For today's assignment, you're going to be working with a modern piece of animation. One thing that you need to do in addition to working with all the FX is to create an FX List, which is literally a list of the actions in the film that are going to require FX and the times at which they happen in the movie.

For your assignment, please do the following:
  1. Create a new Pro Tools session
  2. Import the video called dpaa_animation fx to your session. (Media Share>Audio Post Materials>dpaa_animation fx)
  3. Now Copy the file called Audio Post_FX List from the Media Share to your computer and open it.
  4. In Pro Tools, hit the SPACEBAR to playback the movie. Watch the whole thing through once.
  5. Now watch it again and as you go through it, drop Memory Locators at all the major actions.
  6. After you've got all your locators, click through them one by one and write down the time info and a description of the sound in your FX List.
  7. Now go to File>Import and find all the FX you need and import them to either the region list or individual tracks.
  8. Consider using a microphone to add your own original sounds (grunts, human noises, etc.) Remember that the goal is to make this as realistic as possible.
  9. Do some mixing and automating. Especially concentrate this time on the panning of things (cars moving from side to side, etc.)
  10. Save this as your name_animation FX and have an instructor check it.
  11. Export the whole thing as a Quicktime movie and turn it into the folder called Animation FX in Student Work.
  12. Also turn in your FX list document. Be sure to put your name in the file name: your name_Audio Post_FX list.